From Vintage Digital Paper to Polished Design: What Most People Get Wrong
You found a beautiful piece of vintage digital paper online. The texture feels right. The color has that aged, warm patina you have been searching for. You download it, drop it into your project, and suddenly everything looks flat, pixelated, or just wrong. If this sounds familiar, you are not alone. Many people are drawn to vintage digital paper for its nostalgic charm, but they often stumble over the same hidden pitfalls. Whether you are designing a wedding invitation, building a social media brand, or creating a digital scrapbook, the choices you make around these textured backgrounds can make or break your final result.
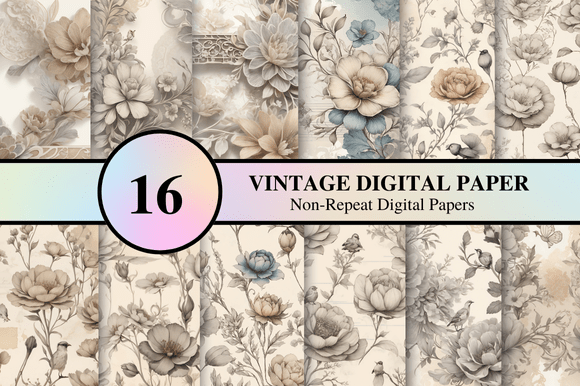
Vintage digital paper refers to scanned or digitally created backgrounds that mimic aged paper, yellowed pages, worn book covers, parchment, or antique stationery. People use them to add warmth, history, and character to modern projects. But what seems like a simple download can quickly become a source of frustration if you overlook a few key details.
The Illusion of Free and Fast
It is tempting to grab the first vintage digital paper you find, especially if it is free or offered in a large bundle at a low price. The mistake here is assuming that all vintage digital paper is created equal. Some files are scanned at low resolution, compressed multiple times, or saved in formats that lose detail. When you zoom in, the paper texture looks blurry or jagged. That worn edge you loved now looks like a messy smudge.
Better approach: Always check the resolution before you download. Look for files that are at least 300 DPI if you plan to print them. For digital use, 150 DPI can work, but if you ever want to scale the texture up, higher resolution gives you room. A 1200-by-1200-pixel file might look fine on a phone screen but will disappoint you on a printed poster.
Color Casts That Mislead Your Eye
Vintage digital paper typically features warm yellows, faded browns, or muted grays. But not all monitors display these tones the same way. A piece of paper that looks softly aged on your laptop can appear muddy or overly orange on someone else screen. Worse, you might not notice until you print it and the color shifts entirely.
One overlooked detail is the color profile embedded in the file. Many vintage digital paper downloads come in sRGB, which is fine for web use. But if you are printing, you want a file with an Adobe RGB or CMYK profile to maintain color fidelity. If the file has no profile at all, your printer software will guess wrong, and you will waste paper and ink.
Practical advice: Before committing to a vintage digital paper set, test one file in your workflow. Place a sample object or text over the paper in your design software. Check how your brand colors look on it. If the paper shifts your colors in an unflattering way, move on. You can always adjust contrast or hue, but you cannot fix a poorly scanned paper that already has a muddy base.
Licensing Traps That Come Back Later
Many people assume that if they bought a vintage digital paper bundle, they can use it anywhere. That is not always true. Some designers include a commercial license only for certain products. Others restrict use in print-on-demand items, templates for resale, or digital products you sell. If you use a vintage digital paper texture in a logo you sell to a client, you could be violating the license.
This mistake affects freelancers, small business owners, and entrepreneurs the most. You might build an entire brand identity around a specific paper texture, only to discover later that you cannot transfer the rights to your client. The fix is simple. Read the license file before you download. If there is no license included, assume the most restrictive terms. Reach out to the creator if you are unsure. Most designers are happy to clarify and may offer extended licenses for a small fee.
Choosing Texture That Fights Your Content
Vintage digital paper has strong visual character. That is why you want it. But that character can also overwhelm your content. A heavily textured paper with deep grain, visible stains, or bold aging effects will compete with text, photos, and graphics. The result is a design that feels busy and hard to read.
Think about the purpose of your project. If you are creating a background for a book cover or a formal invitation, a subtler texture works better. Look for paper that has a gentle grain, soft edges, and muted color. Save the heavily distressed papers for accent pieces, borders, or backgrounds behind minimal text. As a rule, if you have to increase font size or add heavy contrast to make text readable, the paper is too busy for that use.
Overlooking Print Compatibility
Vintage digital paper looks wonderful on screen. But paper behaves differently on a printer. Some textures that appear smooth in digital form come out patchy or grainy in print. This is especially true if you use an inkjet printer, which handles gradients and subtle tones differently than a laser printer.
Another common oversight is the paper stock you print on. Vintage digital paper designed to look like aged parchment will lose its effect if you print it on bright white, glossy photo paper. The warm tones clash with the cool white base, and the texture feels fake. Instead, print on matte, cream, or textured paper stock that complements the digital paper style. Some designers even recommend printing a test swatch on the actual paper you plan to use so you can see how the ink interacts with the surface.
The Trap of Overcomplicating the Design
When you have a beautiful vintage digital paper collection, it can be tempting to use multiple papers in one project. You might layer a worn book cover texture with a soft floral paper and an old map background. The result is visual chaos. The eye does not know where to focus, and the vintage feel becomes a jumble of competing eras and styles.
A better approach is to choose one primary vintage digital paper and use it as your foundation. If you want variety, use subtle variations of the same paper set, like a slightly darker shade or a different grain direction. Keep your color palette limited to two or three tones that complement the paper. This restraint actually enhances the vintage feel because it mimics the natural wear and consistency of real aged paper.
Neglecting File Organization and Naming
This sounds trivial, but it causes real frustration. Vintage digital paper bundles often come with generic filenames like "paper_04.jpg" or "texture_12.png." When you have dozens of these files, finding the right one later becomes a chore. You waste time opening each file to see what it looks like. Worse, you might use the same paper twice in different projects without realizing it.
Spend ten minutes renaming your files with descriptive names that include the paper color, texture type, and any notable details. For example, "cream_parchment_fine_grain.jpg" is much more useful than "texture_07.jpg." Organize them into folders by color family or usage, such as "warm tones," "cool tones," "heavily distressed," or "subtle textures." This small habit saves you time and keeps your creative flow uninterrupted.
Ignoring the Source Quality
Not all vintage digital paper comes from the same quality source. Some are scanned from actual antique books and documents, which gives them authentic wear, foxing, and natural color variation. Others are created digitally from scratch. Both can be excellent, but you need to know what you are getting. A digitally created paper might look too even or repetitive, especially if the texture is tiled. A scanned paper might have dust spots, uneven lighting, or visible scanner artifacts.
When you download, look at the preview images carefully. Zoom in to see the grain detail. Read the product description to see if the creator mentions the source. Authentic scans typically have a more organic, irregular texture. Digital recreations offer consistency and can be edited without losing quality. Choose based on your project needs. For a product that needs to look genuinely aged, go with a high-quality scan. For a background that needs to be seamless or easily editable, a well-made digital creation is often better.
What to Check Before You Commit
Before you integrate vintage digital paper into a project you care about, run through a short checklist. First, verify the resolution and color profile. Second, read the license terms. Third, test the paper with your content, especially text and logos. Fourth, print a sample on your intended paper stock. Fifth, consider how the paper will look in both digital and print formats. If it works in all these scenarios, you have found a keeper.
Vintage digital paper can elevate your work from ordinary to memorable when used thoughtfully. The mistakes people make usually come from rushing, assuming, or skipping a small test. By taking a few extra minutes to evaluate quality, compatibility, and licensing, you save yourself from rework and disappointment. The best projects feel effortless because the background supports the content instead of fighting it. With the right vintage digital paper in your hands, you can create something that feels both timeless and intentional.